Step 1) Launch the app Task Scheduler in Windows.
Step 2) Action -> Create Task

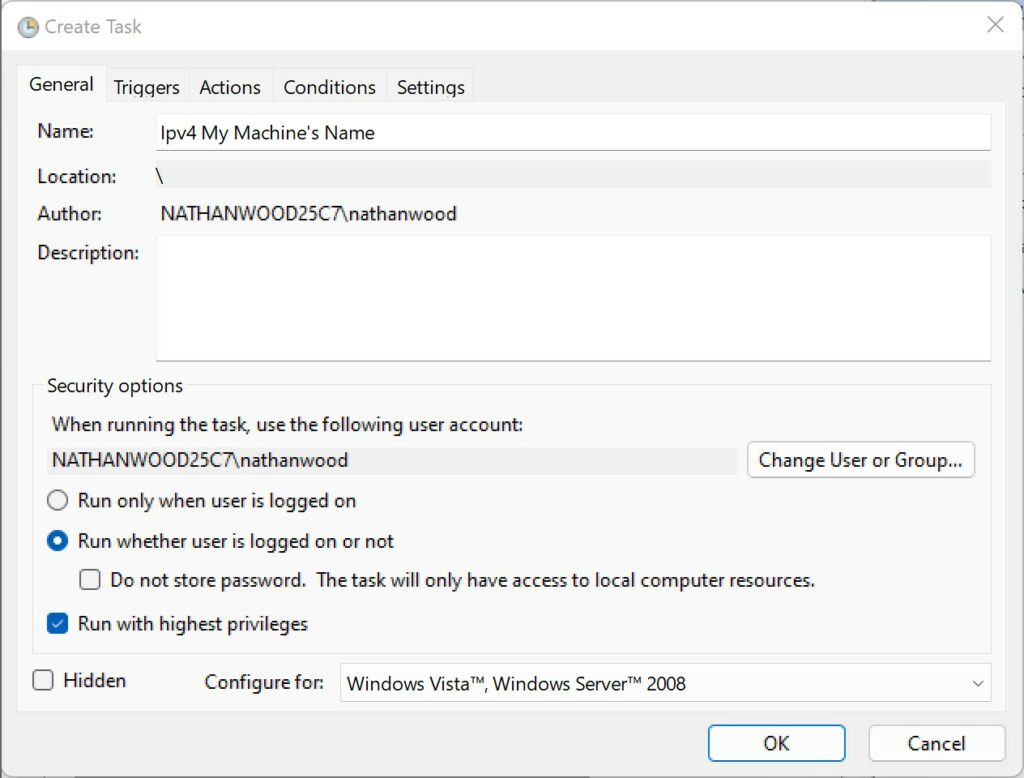
Step 3) On the “General Tab” type in the name. I recommend for the IPv4 address to type in IPv4 and the machine’s name. That way you can easily find it later in your tasks when you search for it. (You’ll need to create a task for both your IPv4 and IPv6 address. But if you don’t have IPv6 you can only setup IPv4 if you so desire.) Click on “Run whether user is logged on or not” and make sure “Run with highest privileges is checked. This will prevent a Window from showing up and annoying you when the trigger is run.
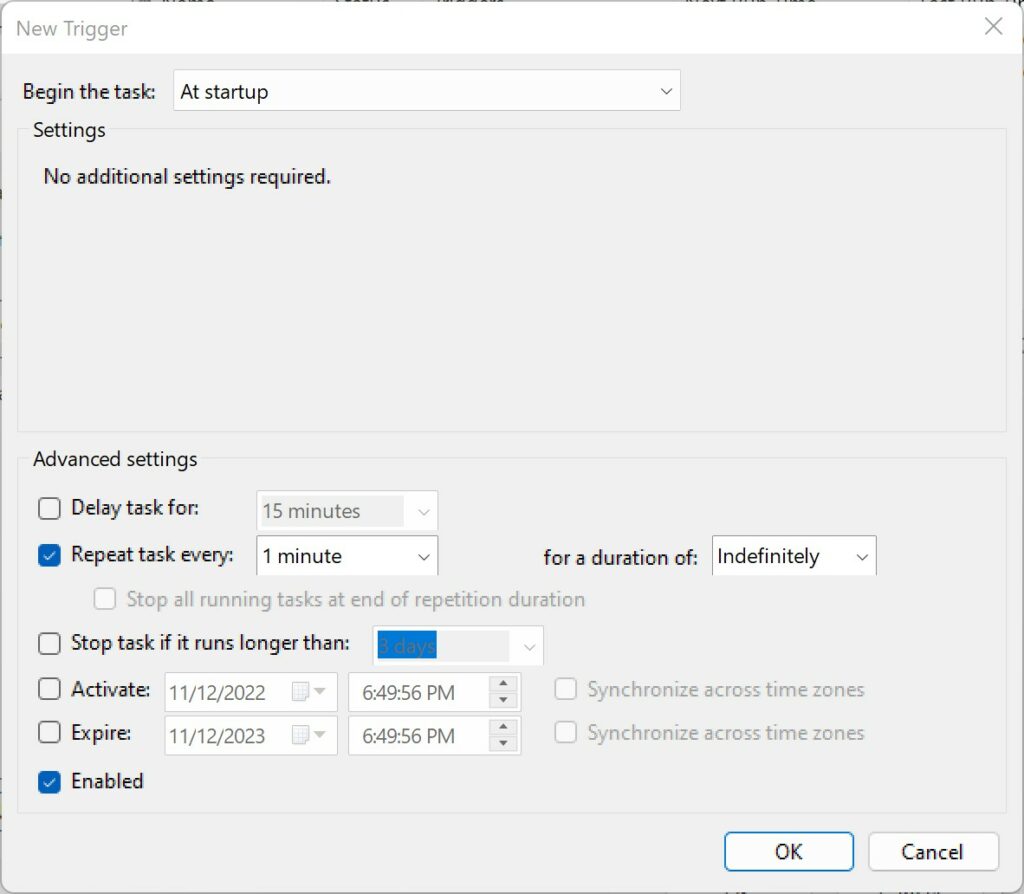
Step 4) Click on the “Trigger” tab next. Click “New” to create a new trigger. Here you are going to create two triggers. The first trigger is for when the machine boots up. For the menu “Begin the task” select “At Startup.” Then under Advanced settings check “Repeat task for every 1 minute.” Now, 1 minute won’t be an option but if you click your mouse in the little window you can specify 1 minute by typing “1 minute.” Finally, select “for a duration of: Indefinitely.” Note—when using the task scheduler you’ll only be able to ping every minute, you can’t go below 1 minute like 30 seconds. This is a limitation of task scheduler but not a huge one because you’ll know within a minute if your machine is unavailable or your IP changes. Click “Okay.”
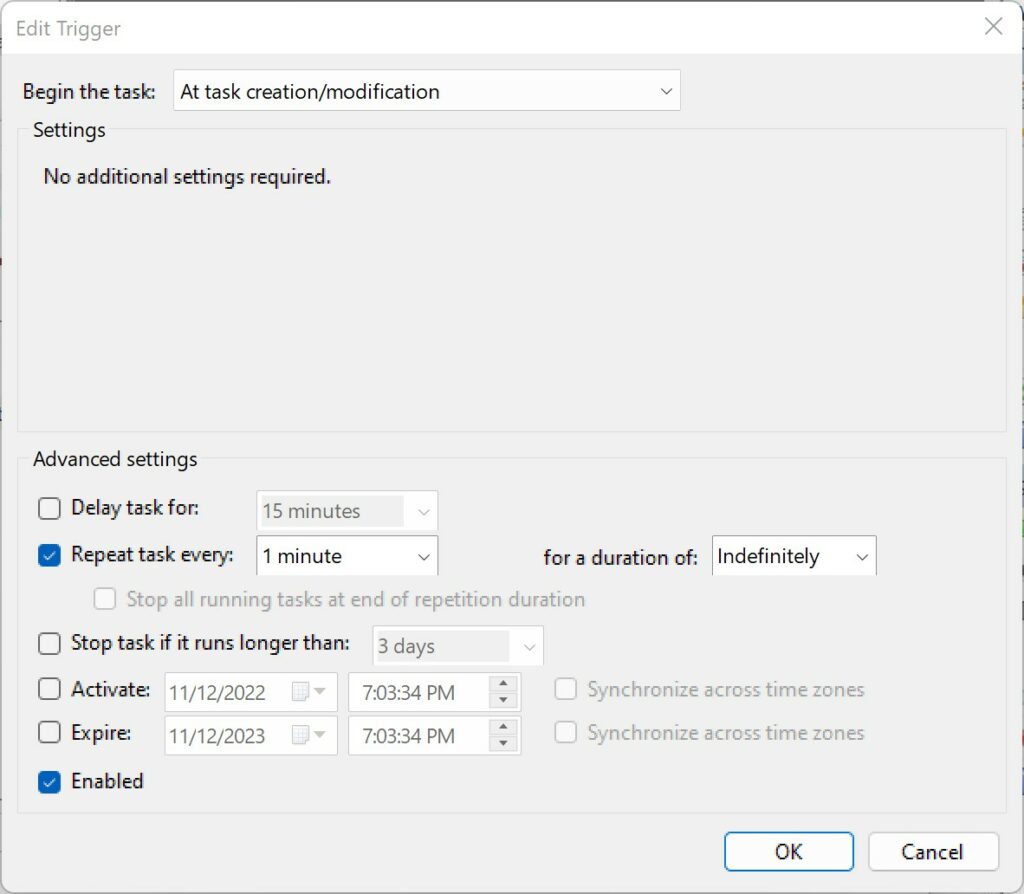
Step 5) This is an optional trigger but I like it because for the first “trigger” to start you have to reboot your computer. So I like to setup another trigger where you Begin the task: “At task creation/modification.” That way after you’re done or you modify this task in the future for any reason it’ll automatically run without having to reboot your computer. So follow the steps in step 4 with the only difference being beginning the task when its created or modified.
Step 6) In Task Schedule, click on the “Actions” tab. Click “New.” For “Action” select “Start a Program as seen in the image below. For “Settings” type “powershell” in the box, since you will run a powershell script. In the “Add Arguments” Box copy and paste this to get your IPv4 address:
-ExecutionPolicy unrestricted -Command “(New-Object Net.WebClient).DownloadString(\”https://ipv4.myipnotify.com/ip.php?key=apirandomseriesofcharactershere\”)”
Then, go to your My Devices panel and copy and paste the “https://ipv4.myipnotify.com/ip.php?key=apirandomseriesofcharactershere” with the “IPv4 Device Key Link.”

Step 7) Repeat the steps to fetch your IPv6 address using the same steps above. Under “Actions” click “Run” and go to your My Device panel and see if it detects your IPv4 and IPv6 addresses.
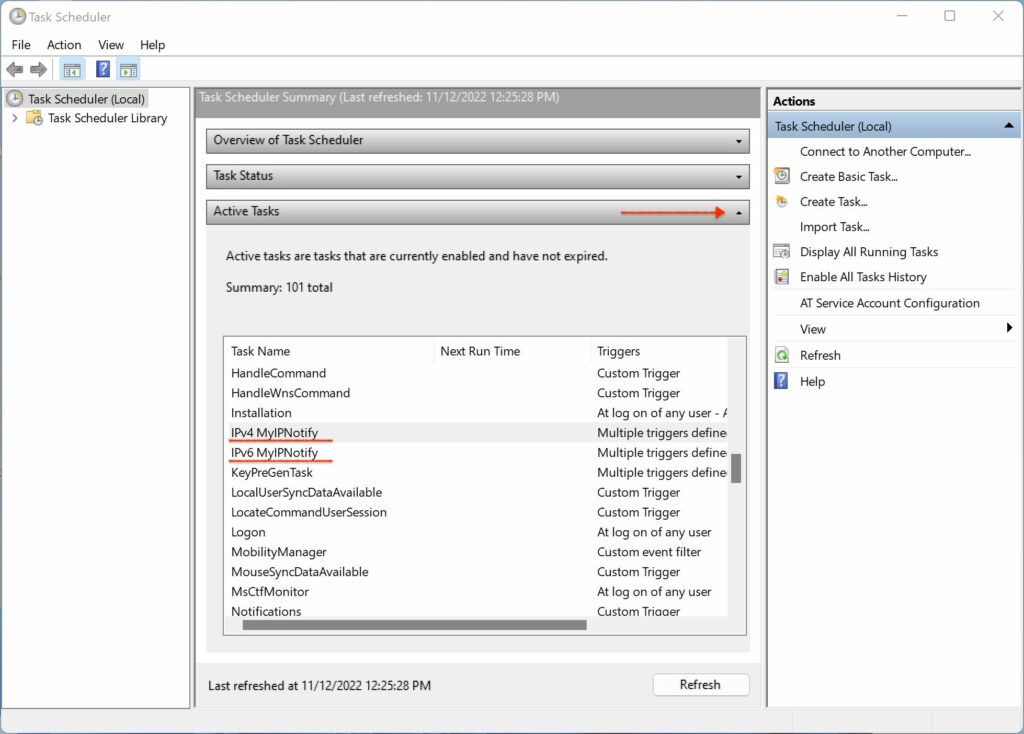
Step 8) If you click on Active Tasks you can see and verify the tasks you created for your IPv4 and IPv6 address.